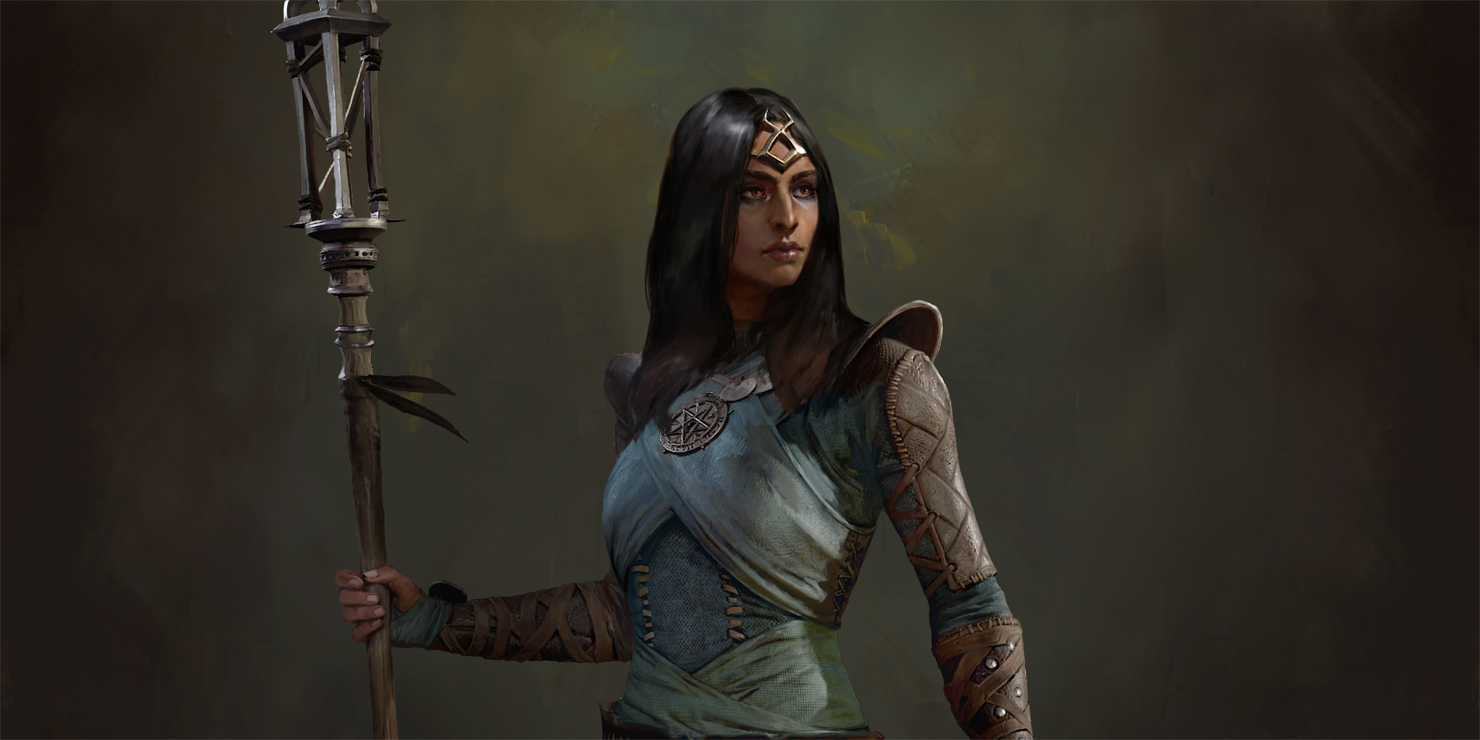
Mastering the Art of Skill Allocation in Diablo 4: Expert Tips and Recommended Builds

News

Mastering the Art of Skill Allocation in Diablo 4: Expert Tips and Recommended Builds

2023-05-05 15:29


In Diablo 4, the skill tree is a key component of character development, allowing players to customize their abilities and playstyle. However, with so many nodes and paths to choose from, it can be overwhelming to navigate the skill tree and make informed decisions about how to allocate skill points. That's why we've put together a comprehensive guide to the skill tree structure, covering the different types of nodes you'll encounter and how to make the most of them. We'll also provide in-depth skill guides for each of the game's classes: Barbarian, Sorcerer, Rogue, Druid, and Necromancer. Whether you're a seasoned Diablo player or just starting out, this guide will help you optimize your character build and dominate in the world of Sanctuary.

Skill Tree Structure: A Comprehensive Guide

The Skill Tree is a crucial component of any RPG game. It is the foundation of character development and customization, allowing players to tailor their skills to their preferred playstyle. In this guide, we will discuss the Skill Tree structure and how it works in most RPG games.


The Skill Tree is divided into 7 clusters, each with its own set of skills and passives. As you invest skill points, you unlock access to higher tiers of the tree, which contain stronger and more complex skills. The following is a breakdown of the Skill Tree structure:

0 points: Basic Cluster

At the start of the game, you have access to only the Basic Cluster. This cluster contains your weakest attacks, but they have no cost or cooldown. Many of them help you generate your Primary Resource, which you need to use more powerful skills.

2 points: Core Cluster

Once you invest 2 skill points, you unlock access to the Core Cluster. The Core Cluster contains your main damage-dealing skills. They deal substantially more damage than Basic skills but come at the cost of your resource. This cluster also contains some passives that improve your Core skills.

6 points, 11 points, and 16 points: Unique Clusters every Class

At 6, 11, and 16 skill points invested, you unlock access to Unique Clusters per Class. These clusters comprise an assortment of skills and passives.They usually include defensive and mobility skills, as well as more damage-oriented skills that are more complex and conditional than Basic and Core skills. . Each class has its own set of Unique Clusters, tailored to their specific abilities.

23 points: Ultimate Cluster

Once you invest 23 skill points, you unlock access to the Ultimate Cluster. At this tier, you'll unlock your Ultimate skill, along with its enhancements and supplementary passives. Ultimate skills possess immense power, but come with a lengthy cooldown of at least 45 seconds. Unlike other skills in the tree, you can only choose and have one Ultimate skill at a time.

33 points: Final Cluster

The Final Cluster is unlocked when you invest 33 skill points. This cluster contains several big passives that are a lot stronger than all the others. However, similar to Ultimate skills, you can only pick one passive from this cluster.


In conclusion, the Skill Tree is a vital component of any RPG game, allowing players to customize their skills and playstyle. Understanding the Skill Tree structure is essential to maximizing the potential of your character. As you invest skill points, you unlock access to higher tiers of the tree, which contain stronger and more complex skills. So, invest your skill points wisely and explore all the possibilities that the Skill Tree has to offer!

Different Types of Nodes on the Skill Tree

The Skill Tree is made up of several types of nodes that offer various benefits to your character. Here is an overview of the different types of nodes you can expect to find:

Active Skills

Active Skills are square-shaped nodes that are found in the first five clusters of the Skill Tree. You have the ability to allocate up to five skill points to each active skill, with each subsequent point increasing the skill's power by 10% compared to its rank 1 state.. A fully leveled skill with 5/5 points will be 40% stronger than 1/5 points. A skill that is fully leveled with 5/5 points will have a 40% increase in strength compared to when it had only 1/5 points.The first point you invest into an active skill is ten times more powerful than the next four. Once you have at least one point invested in a skill, it is unlocked and can be added to your skill bar for use in combat.

Ultimate Skills

Ultimate Skills are a subtype of Active Skills, and they are found in the penultimate cluster of the Skill TreeThe primary distinction between Ultimate Skills and other Active Skills is that you can only allocate one point to an Ultimate Skill, and you can possess only one Ultimate Skill at any given time.

Skill Upgrades

Skill Upgrades are diamond-shaped nodes that are attached to every single active skill in the Skill Tree. After investing some points into an active skill, you will unlock its corresponding upgrade called "Enhanced [skill name]." Once you obtain this upgrade, the second level of upgrades for the skill will become available, where you choose between one of two options. Ultimate Skills only have two upgrades and do not offer a choice.

Passives

Passives are round-shaped nodes that can be found in any cluster below the first one. You can invest up to three points into each passive, with each point providing the same benefit. For example, a passive with 3/3 points will have triple the strength of when it had 1/3 points.The majority of passives can be accessed as soon as you unlock their cluster; however, a few passives may be locked and require investing points in one or two other passives to unlock.

Ultimate Passives

The last cluster of the Skill Tree contains big round nodes called Ultimate Passives. These nodes offer powerful passive effects, similar to other passives. However, you can only pick one Ultimate Passive, and you only need to invest one point into it.


In conclusion, understanding the different types of nodes on the Skill Tree is crucial to creating a powerful and customized character in any RPG game. By investing your skill points wisely and selecting the nodes that best suit your playstyle, you can create a character that is uniquely your own.

Skill points

As you traverse the game and progress through levels, you earn valuable skill points that can be used to unlock and upgrade your abilities. Beginning at level 2, each level you gain will grant you one skill point, which can be allocated freely without any cost. However, if you need to undo any skill point allocation, you will be required to pay a certain amount of Gold starting from level 7, with the cost increasing steeply as you level up.


In addition to the skill points earned through leveling, you can also obtain a few extra points through the Renown system. For instance, in the Fractured Peaks region, you can earn an additional three skill points. Assuming similar opportunities across the other four regions, you can potentially gain a total of 15 skill points from renown.


It's worth noting that some items in the game can also enhance your skills, but you still need to invest at least one skill point into those skills before you can access their upgrades. These additional ranks do not affect your skill tree progression, but they can significantly boost your character's power.


Overall, carefully managing your skill point allocation is crucial in creating a unique and powerful character that best suits your playstyle.

Barbarian Skills Guides


The Barbarian class has long been known for its brute strength and ability to dominate in close-quarters combat, making it a fan favorite in the Diablo franchise.  If you're the type of player who enjoys fearlessly charging into battle, then the Barbarian is the perfect pick for you.


So if you're ready to take your Barbarian gameplay to the next level and stand out from the crowd, this guide is the perfect resource for you.

Upheaval Barbarian

We recommend that you use this appliance when you first start playing the character,This leveling guide takes a unique approach by emphasizing the devastating Upheaval ability.  Unlike other Barbarian builds, Upheaval deals tremendous damage from range, granting you superior survivability.  By prioritizing the generation of massive amounts of Fury, you can unleash a barrage of Upheavals with unparalleled efficiency, paving the way for swift and successful leveling.


level 2

Flay

level 3

Enhanced Flay

level 4

Upheaval

level 5

Enhanced Upheaval

level 6

Violent Upheaval

level 7

Battle Flay

level 8

Rallying Cry

level 9

Enhanced Rallying Cry

level 10

Tactical Rallying Cry

level 11

Upheaval

level 12

Upheaval

level 13

Leap

level 14

War Cry (Challenging Shout if HC)

level 15

Enhanced Leap

level 16

Power Leap

level 17

Upheaval

level 18

Death Blow

level 19

Enhanced Death Blow

level 20

Fighter's Death Blow

level 21

Upheaval

level 22

Booming Voice

level 23

Booming Voice

level 24

Booming Voice

level 25

Call of the Ancients

Renown 1&2

Prime & Supreme Call of the Ancients

Whirlwind Barbarian

This fan-favorite spin-to-win build may not be the strongest initially, but it becomes more effective once the Fury generation improves. It excels at clearing trash mobs but may struggle against bosses. Nonetheless, it's a fun and viable option for players who enjoy the whirlwind playstyle.


level 2

Flay

level 3

Enhanced Flay

level 4

Whirlwind

level 5

Enhanced Whirlwind

level 6

Violent Whirlwind

level 7

Battle Flay

level 8

Rallying Cry

level 9

Enhanced Rallying Cry

level 10

Tactical Rallying Cry

level 11

Whirlwind

level 12

Whirlwind

level 13

Leap

level 14

War Cry (Challenging Shout if HC)

level 15

Enhanced Leap

level 16

Power Leap

level 17

Upheaval

level 18

Death Blow

level 19

Enhanced Death Blow

level 20

Fighter's Death Blow

level 21

Whirlwind

level 22

Booming Voice

level 23

Booming Voice

level 24

Booming Voice

level 25

Call of the Ancients

Renown 1&2

Prime & Supreme Call of the Ancients

Rend Thorns Barbarian

This distinctive playstyle gained immense popularity during the Early Access Beta.  During the initial stages of gameplay, Thorns is an immensely powerful attribute, particularly if you are able to acquire gear that features Thorns rolls without having to invest excessive amounts of Gold rerolling at the Occultist. While this build guide places more emphasis on maximizing Rend towards the end, players could easily allocate those points towards the Thorns passives that have already been acquired, effectively transforming themselves into a formidable Barbed Wire character.

level 2

Flay

level 3

Enhanced Flay

level 4

Rend

level 5

Enhanced Rend

level 6

Furious Rend

level 7

Combat Flay

level 8

Challenging Shout

level 9

Enhanced Challenging Shout

level 10

Strategic Challenging Shout

level 11

Outburst

level 12

Tough as Nails

level 13

Leap

level 14

Rallying Cry

level 15

Enhanced Leap

level 16

Power Leap

level 17

Enhanced Rallying Cry

level 18

Strategic Rallying Cry

level 19

Thick Skin

level 20

Counteroffensive

level 21

Rend

level 22

Rend

level 23

Rend

level 24

Rend

level 25

Call of the Ancients

Renown 1&2

Prime & Supreme Call of the Ancients

Sorcerer Skills Guides

The Sorcerer is a true master of the raw elemental magics that permeate throughout the world of Sanctuary. With the ability to summon blizzards, ignite foes with hydra, or engage in lightning ping-pong with Chain Lightning, the Sorcerer is unparalleled in ranged destruction. However, be cautious not to become overconfident and end up bested in close combat.

Hydra Lightning Sorcerer

The leveling guide in question adopts a distinctive methodology by prioritizing a selection of favored skills from the past.  The core of the guide revolves around the utilization of Hydra and Chain Lightning, which are renowned for their extraordinary single-target damage-per-second (DPS) output. Meanwhile, Fireball in the Enchantment Slot can cover all your AoE needs, making for a well-rounded and formidable build. With these skills at your disposal, you can easily dispatch enemies from a safe distance and quickly level up your Sorcerer.

level 2

Arc Lash

level 3

Enhanced Arc Lash

level 4

Chain Lightning

level 5

Enhanced  Chain Lightning

level 6

Greater Chain Lightning

level 7

Chain Lightning

level 8

Teleport

level 9

Chain Lightning

level 10

Chain Lightning

level 11

Chain Lightning

level 12

Flickering Arc Lash

level 13

Hydra

level 14

Enhanced Hydra

level 15

Fireball

Enchantment Slot

Fireball

level 16

Ice Armor

level 17

Frost Nova

level 18

Enhanced Frost Nova

level 19

Mystical Frost Nova

level 20

Align the Elements

level 21

Protection

level 22

Protection

level 23

Protection

level 24

Invoked Hydra

level 25

Hydra

Renown 1&2

Hydra

Full Fire Sorcerer

This particular strategy involves the utilization of Fireball, which was eventually substituted with Firewall, as well as Hydra and Inferno, all of which work in tandem to create a vast expanse of fiery destruction across the entire map.  It might be assumed that the inhabitants of the Seven Hells are accustomed to living in scorching hot environments, but in reality, they end up becoming excellent fuel for the flames.


level 2

Frost Bolt

level 3

Enhanced Frost Bolt

level 4

Fireball

level 5

Glinting Frost Bolt

level 6

Fireball

level 7

Fireball

level 8

Teleport

level 9

Ice Armor

level 10

Frost Nova

level 11

Enhanced Frost Nova

level 12

Mystical Frost Nova

level 13

Hydra

level 14

Enhanced Hydra

level 15

Hydra

Enchantment Slot

Fireball

level 16

Hydra

level 17

Hydra

level 18

Firewall

level 19

Enhanced Firewall

level 20

Mage's Firewall

level 21

Hydra

level 22

Summoned Hydra

level 23

Firewall

level 24

Align the Elements

level 25

Protection

Renown 1&2

Protection

Full Lightning Sorcerer

The strategy employed in this particular build involves the utilization of Chain Lightning to deliver effective damage to a single target, while simultaneously utilizing a combination of Arc Lash Enchantment and Shocking Impact passive to generate area-of-effect (AoE) damage. The potency of this build is particularly notable when Unstable Currents is active, but the skill's 70-second cooldown with a mere 10-second duration poses a significant challenge. However, as one begins to accumulate more Cooldown Reduction, Critical Strike Chance, and Crowd Control Duration, the effectiveness of the build increases exponentially. Nevertheless, achieving this level of optimization can be quite challenging when operating within the constraints of a level 25 capped BETA.


level 2

Arc Lash

level 3

Enhanced Arc Lash

level 4

Chain Lightning

level 5

Enhanced Chain Lightning

level 6

Greater Chain Lightning

level 7

Chain Lightning

level 8

Teleport

level 9

Chain Lightning

level 10

Chain Lightning

level 11

Chain Lightning

level 12

Ice Armor

level 13

Lightning Spear

level 14

Enhanced Lightning Spear

level 15

Invoked Lightning Spear

Enchantment Slot

Arc Lash

level 16

Enhanced Teleport

level 17

Glinting Arc Lash

level 18

Static Discharge

level 19

Shocking Impact

level 20

Shocking Impact

level 21

Shocking Impact

level 22

Align the Elements

level 23

Protection

level 24

Protection

level 25

Unstable Currents

Renown 1

Prime Unstable Currents

Renown 2

Protection

Ice Shards Sorcerer

The crux of this Sorcerer build centers around its Cold-based theme, which harnesses the power of Ice Shards to skewer and vanquish hordes of menacing monsters. While the build boasts immense strength once all the necessary components are in place, it is heavily reliant on having the correct Enchantment Slot, which can pose significant difficulties during the initial levels ranging from 5 to 15. However, those who opt to embrace this build can also unlock the highly advantageous Aspect of the Piercing Cold by venturing into the treacherous Dead Man's Dredge.


level 2

Frost Bolt

level 3

Enhanced Frost Bolt

level 4

Ice Shards

level 5

Enhanced lce Shards

level 6

Glinting Frost Bolt

level 7

Greater lce Shards

level 8

Teleport

level 9

Ice Armor

level 10

Frost Nova

level 11

Enhanced Frost Nova

level 12

Mystical Frost Nova

level 13

Ice Shards

level 14

lce Shards

level 15

lce Shards

Enchantment Slot

lce Shards

level 16

lce Shards

level 17

Frost Nova

level 18

Frost Nova

level 19

Frost Nova

level 20

Frost Nova

level 21

Align the Elements

level 22

Protection

level 23

Protection

level 24

Protection

level 25

Ice Blades

Renown 1

Enhanced Ice Blades

Renown 2

Summoned Ice Blades

Ice Blades Deep Freeze Sorcerer

The following build can be deemed somewhat gimmicky in nature, as its success is hinged upon the reduction of Summoned Ice Blades' cooldown time, resulting in an overwhelming number of blades being produced. Additionally, the build also utilizes Frost Nova to keep targets Frozen and Vulnerable, while Teleporting across the battlefield with ease, rendering the user almost entirely invincible. However, it is important to note that prior to attaining level 15, this build may prove ineffective. Furthermore, it is widely anticipated that this build may be subject to significant nerfs before the game's official release, making it imperative for interested players to take advantage of its current power while they still can.


level 2

Arc Lash

level 3

Enhanced Arc Lash

level 4

Chain Lightning

level 5

Flickering Arc Lash

level 6

Chain Lightning

level 7

Chain Lightning

level 8

Teleport

level 9

Ice Armor

level 10

Frost Nova

level 11

Enhanced Frost Nova

level 12

Mystical Frost Nova

level 13

Ice Shards

level 14

Enhanced Ice Blades

level 15

Summoned Ice Blades

Enchantment Slot

Ice Shards

level 16

Flame Shield

level 17

Ice Blades

level 18

Ice Blades

level 19

Ice Blades

level 20

Ice Blades

level 21

Align the Elements

level 22

Protection

level 23

Protection

level 24

Protection

level 25

Deep Freeze

Renown 1

Prime Deep Freeze

Renown 2

Supreme Deep Freeze

Rogue Skills Guides

The Rogue is a nimble and quick combatant, who relies on a blend of melee and ranged attacks, augmented by a variety of sneaky tactics, such as grenades and traps, to outmaneuver their adversaries.  The Rogue's gameplay is characteristically fast-paced, with an assortment of combat styles that can be customized to cater to the player's individual preferences.  The Rogue's abilities are fueled by Energy, a resource that steadily replenishes over time or can be rapidly recharged via certain effects.  While the majority of the Rogue's skills deliver Physical damage as the default, there exist methods to infuse elemental damage types such as Cold, Poison, and Shadow into their attacks.

Twisting Blades Rogue

Twisting Blades proves to be an exceptional choice of skill for players seeking to level up quickly, owing to its capacity to deliver area-of-effect (AoE) damage while on the move. The skill integrates a melee-based approach with unparalleled mobility, enabling players to strike multiple targets while darting through various zones with ease. Although it may not be the simplest skill to master, the satisfaction of executing it flawlessly makes it all the more worthwhile.


level 2

Puncture

level 3

Enhanced Puncture

level 4

Twisting Blades

level 5

Enhanced Twisting Blades

level 6

Fundamental Puncture

level 7

Advanced Twisting Blades

level 8

Dash

level 9

Shadow Step

level 10

Twisting Blades

level 11

Twisting Blades

level 12

Twisting Blades

level 13

Twisting Blades

level 14

Smoke Grenade

level 15

Dash & Unlock Combo Points

level 16

Exploit

level 17

Exploit

level 18

Shadow Imbuement

level 19

Enhanced Shadow Imbuement

level 20

Blended Shadow Imbuement & Inner Sight Specialization

level 21

Shadow Crash

level 22

Consuming Shadows

level 23

Consuming Shadows

level 24

Consuming Shadows

level 25

Add Exploit, Swap Smoke Grenade with Shadow Clone

Renown 1

Prime Shadow Clone

Renown 2

Supreme Shadow Clone

Barrage Rogue

For those who desire a straightforward ranged build, look no further than this. Barrage equips players with the ability to unleash hails of arrows upon groups of enemies, whilst also providing impressive single-target damage by employing shotgunning techniques with multiple arrows.


level 2

Puncture

level 3

Enhanced Puncture

level 4

Barrage

level 5

Enhanced Barrage

level 6

Fundamental Puncture

level 7

Improved Barrage

level 8

Dash

level 9

Barrage

level 10

Barrage

level 11

Barrage

level 12

Barrage

level 13

Smoke Grenade

level 14

Dark Shroud

level 15

Enhanced Smoke Grenade & Unlock Combo Points

level 16

Enhanced Dark Shroud

level 17

Subverting Dark Shroud

level 18

Shadow Imbuement

level 19

Enhanced Shadow Imbuement

level 20

Blended Shadow Imbuement & Inner Sight Specialization

level 21

Shadow Crash

level 22

Consuming Shadows

level 23

Consuming Shadows

level 24

Exploit

level 25

Innervation

Renown 1

Innervation

Renown 2

Innervation

Flurry Rogue

For players seeking an alternative full-melee play style that is less complex than Twisting Blades, this build is an excellent choice. Rather than darting around the battlefield, this build focuses on utilizing daggers to stab opponents. The build incorporates both Shadow Imbuement and Poison Imbuement to enhance both area-of-effect (AoE) and single-target damage, respectively.


level 2

Puncture

level 3

Enhanced Puncture

level 4

Flurry

level 5

Flurry Barrage

level 6

Fundamental Puncture

level 7

Improved Flurry

level 8

Dash

level 9

Shadow Step

level 10

Flurry

level 11

Flurry

level 12

Flurry

level 13

Smoke Grenade

level 14

Enhanced Smoke Grenade

level 15

Flurry & Unlock Combo Points

level 16

Weapon Mastery

level 17

Weapon Mastery

level 18

Shadow Imbuement

level 19

Enhanced Shadow Imbuement & Swap Shadow Step to PoisonImbuement

level 20

Mixed Shadow Imbuement & Inner Sight Specialization

level 21

Enhanced Poison Imbuement

level 22

Exploit

level 23

Exploit

level 24

Exploit

level 25

Malice

Renown 1

Malice

Renown 2

Malice

Penetrating Shot Rogue

For players seeking a genuine archery-centric build, Penetrating Shot is the way to go. This long-range build allows players to pick off monsters from a safe distance, employing the combination of Shadow Imbuement and Poison Imbuement, much like Flurry, to obtain the best of both worlds.


level 2

Forceful Arrow

level 3

Enhanced Forceful Arrow

level 4

Penetrating Shot

level 5

Enhanced Penetrating Shot

level 6

Improved Penetrating Shot

level 7

Fundamental Forceful Arrow

level 8

Dash

level 9

Penetrating Shot

level 10

Penetrating Shot

level 11

Penetrating Shot

level 12

Penetrating Shot

level 13

Dark Shroud

level 14

Enhanced Dark Shroud

level 15

Countering Dark Shroud & Unlock Combo Points

level 16

Exploit

level 17

Exploit

level 18

Shadow Imbuement

level 19

Poison Imbuement

level 20

Enhanced Shadow Imbuement

level 21

Blended Shadow Imbuement

level 22

Shadow Crash

level 23

Consuming Shadows

level 24

Consuming Shadows

level 25

Enhanced Poison Imbuement

Renown 1

Mixed Poison Imbuement

Renown 2

Exploit

Druid Skills Guides

The Druid class has a vast array of abilities at their disposal, allowing them to harness the forces of nature to devastating effect. With Tornadoes, Landslides, and Lightning Storms, the Druid can wreak havoc on their enemies. Additionally, you can opt to transform into a Werewolf or Werebear, using abilities like Shred or Pulverize to focus on close-range combat.


Tornado Druid

This leveling guide is dedicated to the Tornado skill, harkening back to the good old days of Diablo 2! With this build, you'll unleash powerful twisters upon your enemies, dealing continuous damage over time. In addition, Earthen Bulwark, Wolves, and Trample provide excellent utility in the form of defensive capabilities and mobility. These skills only require a single skill point, leaving plenty of room for experimentation with different passive abilities.


level 2

Wind Shear

level 3

Enhanced Wind Shear

level 4

Tornado

level 5

Enhanced Tornado

level 6

Primal Tornado

level 7

Wild Wind Shear

level 8

Tornado

level 9

Tornado

level 10

Tornado

level 11

Tornado

level 12

Earthen Bulwark

level 13

Enhanced Earthen Bulwark

level 14

Nature's Reach

level 15

Nature's Reach

level 16

Nature's Reach

level 17

Wolves

level 18

Trample

level 19

Hurricane

level 20

Enhanced Hurricane

level 21

Natural Hurricane

level 22

Elemental Exposure

level 23

Enhanced Wolves

level 24

Ferocious Wolves

level 25

Defiance

Renown 1

Defiance

Renown 2

Defiance

Lightning Storm Druid

Lightning Storm is a devastating AoE attack that deals massive amounts of lightning damage, making it ideal for clearing out groups of enemies.  However, it's important to note that you'll need to use Lightning Storm every four seconds to prevent having to recharge it.  While it's an excellent choice for dealing with crowds, it's not particularly effective against single targets.


level 2

Storm Strike

level 3

Enhanced Storm Strike

level 4

Lightning Storm

level 5

Enhanced Lightning Storm

level 6

Primal Lightning Storm

level 7

Lightning Storm

level 8

Lightning Storm

level 9

Lightning Storm

level 10

Lightning Storm

level 11

Earthen Bulwark

level 12

Enhanced Earthen Bulwark

level 13

Cyclone Armor

level 14

Nature's Reach

level 15

Nature's Reach

level 16

Nature's Reach

level 17

Heart of the Wild

level 18

Trample

level 19

Elemental Exposure

level 20

Elemental Exposure

level 21

Elemental Exposure

level 22

Wild Impulses

level 23

Wild Impulses

level 24

Wild Impulses

level 25

Defiance

Renown 1

Circle of Life

Renown 2

Defiance

Landslide Druid

Landslide is a potent attack that deals significant damage, but it has limited coverage when it comes to AoE. This build is particularly adept at taking down individual targets and picking off elite enemies from afar, frequently stunning them in the process. However, it may take some time and practice to become truly proficient with this build.


level 2

Earth Strike

level 3

Enhanced Earth Spike

level 4

Landslide

level 5

Enhanced Landslide

level 6

Primal Landslide

level 7

Landslide

level 8

Landslide

level 9

Landslide

level 10

Landslide

level 11

Earthen Bulwark

level 12

Enhanced Earthen Bulwark

level 13

Preserving Earthen Bulwark

level 14

Cyclone Armor

level 15

Heart of the Wild

level 16

Wild Impulses

level 17

Wild Impulses

level 18

Wild Impulses

level 19

Trample

level 20

Crushing Earth

level 21

Nature's Reach

level 22

Safeguard

level 23

Safeguard

level 24

Safeguard

level 25

Stone Guard

Renown 1

Stone Guard

Renown 2

Stone Guard

Shred Druid

This build centers around the Werewolf abilities of the Druid, allowing you to stay in this form for extended periods. The focus is on utilizing the Shred ability, which is a powerful three-attack combo that deals the most damage with the final strike.


level 2

Claw

level 3

Enhanced Claw

level 4

Shred

level 5

Enhanced Shred

level 6

Raging Shred

level 7

Shred

level 8

Earthen Bulwark

level 9

Enhanced Earthen Bulwark

level 10

Shred

level 11

Shred

level 12

Shred

level 13

Blood Howl

level 14

Wolves

level 15

Ravens

level 16

Enhanced Ravens

level 17

Ferocious Ravens

level 18

Predatory Instinct

level 19

Hurricane

level 20

Enhanced Hurricane

level 21

Natural Hurricane

level 22

Elemental Exposure

level 23

Preserving Earthen Bulwark

level 24

Preserving Blood Howl

level 25

Predatory Instinct

Renown 1

Predatory Instinct

Renown 2

Digitigrade Gait

Pulverize Druid

This build is built around the Pulverize ability, which allows you to pulverize your enemies with massive melee hits while in Werebear form. Even the toughest demons will crumble before your might! While this skill is purely melee-focused, it provides excellent defensive capabilities. The best part about this build is that you'll be able to stay in Werebear form almost constantly.


level 2

Maul

level 3

Enhanced Maul

level 4

Pulverize

level 5

Enhanced Pulverize

level 6

Primal Pulverize

level 7

Earthen Bulwark

level 8

Enhanced Earthen Bulwark

level 9

Pulverize

level 10

Pulverize

level 11

Pulverize

level 12

Pulverize

level 13

Wolves

level 14

Enhanced Wolves

level 15

Ferocious Wolves

level 16

Preserving Earthen Bulwark

level 17

Trample

level 18

Trample

level 19

Mending

level 20

Provocation

level 21

Provocation

level 22

Provocation

level 23

Predatory Instinct

level 24

Predatory Instinct

level 25

Grizzly Rage

Renown 1

Prime Grizzly Rage

Renown 2

Supreme Grizzly Rage

Necromancer Skills Guide

The Necromancer is a master of Life and Death, wielding power over the very essence of their enemies' beings. With the ability to manipulate blood and raise the dead, they can summon minions to serve as both a shield and a deadly offensive force. In the hands of a skilled Necromancer, even the corpses of fallen enemies can become macabre artillery rounds.

Corpse Explosion Necromancer

This leveling guide focuses on combining the two most potent skills in the Necromancer's arsenal for early-game progression. By using Blood Surge to apply Empowered on every other cast, you can deal massive damage to enemies across the entire screen. This ability also conveniently lines up corpses for the true star of the show: Corpse Explosion. With this devastating skill, you can turn your enemies' fallen allies into deadly explosive weapons, wiping out entire groups of foes in one fell swoop.


level 2

Hemorrhage

level 3

Enhanced Hemorrhage

level 4

Blood Surge

level 5

Enhanced Blood Surge

level 6

Paranormal Blood Surge

level 7

Acolyte's Hemorrhage

level 8

Corpse Explosion

level 9

Enhanced Corpse Explosion

level 10

Blood Surge

level 11

Blood Surge

level 12

Blood Surge

level 13

Blood Surge

level 14

Decrepify

level 15

Plagued Corpse Explosion

level 16

Grim Harvest

level 17

Fueled by Death

level 18

Corpse Tendrils

level 19

Enhanced Corpse Tendrils

level 20

Plagued Corpse Tendrils

level 21

Corpse Explosion

level 22

Corpse Explosion

level 23

Corpse Explosion

level 24

Corpse Explosion

level 25

Gruesome Mending

Renown 1

Coalesced Blood

Renown 2

Tides of Blood

Summon Necromancer

This build is designed to maximize the damage output and effectiveness of your summoned minions, placing the Necromancer in a more supportive role. By utilizing AoE and channeled shadow damage-over-time abilities, as well as crowd control, you can ensure that your minions are able to deal maximum damage to your enemies. Additionally, this build allows you to wield the power of the Army of the Dead ultimate skill, which boasts one of the most impressive skill animations in the game. With this ability, you can unleash a tide of creaky bones and blood upon Sanctuary, overwhelming your foes with sheer numbers.

level 2

Decompose

level 3

Enhanced Decompose

level 4

Acolyte's Decompose

level 5

Blight

level 6

Enhanced Blight

level 7

Supernatural Blight

level 8

Corpse Explosion

level 9

Skeletal Warrior Mastery

level 10

Skeletal Warrior Mastery

level 11

Skeletal Warrior Mastery

level 12

Enhanced Corpse Explosion

level 13

Skeletal Mage Mastery

level 14

Skeletal Mage Mastery

level 15

Skeletal Mage Mastery

level 16

Plagued Corpse Explosion

level 17

Blight

level 18

Corpse Tendrils

level 19

Enhanced Corpse Tendrils

level 20

Plagued Corpse Tendrils

level 21

Blight

level 22

Blight

level 23

Blight

level 24

Corpse Explosion

level 25

Army of the Dead

Renown 1

Prime Army of the Dead

Renown 2

Supreme Army of the Dead

Full Blood Necromancer

This build is designed to answer a simple question: what if you could turn Sanctuary into a bloody massacre? To achieve this goal, we focus on utilizing Blood Lance instead of the more commonly used Blood Surge, and we select skills that empower our blood-based damage dealers. Additionally, skills like Corpse Tendrils and Decrepify can be used to crowd control monsters and group them up for maximum AoE damage potential. However, it's important to note that this build can be very difficult to pilot on a controller, so be warned before attempting to use it.

level 2

Hemorrhage

level 3

Enhanced Hemorrhage

level 4

Acolyte's Hemorrhage

level 5

Blood Lance

level 6

Enhanced Blood Lance

level 7

Supernatural Blood Lance

level 8

Blood Lance

level 9

Blood Lance

level 10

Blood Lance

level 11

Blood Lance

level 12

Hemorrhage

level 13

Decrepify

level 14

Amplify Damage

level 15

Amplify Damage

level 16

Amplify Damage

level 17

Death's Reach

level 18

Corpse Tendrils

level 19

Enhanced Corpse Tendrils

level 20

Plagued Corpse Tendrils

level 21

Gruesome Mending

level 22

Coalesced Blood

level 23

Tides of Blood

level 24

Coalesced Blood

level 25

Blood Wave

Renown 1

Coalesced Blood

Renown 2

Tides of Blood

Bone Spirit Necromance

Let me be frank with you: this build has the potential to absolutely decimate crowds of monsters and bosses alike, but only if you can generate enough resources quickly enough. The key to this build is Bone Spirit, which requires you to have maximum resources when you cast it. To make the most of this skill, we focus on reducing its cooldown as much as possible to spam it. However, if you don't have enough resources, you'll be left vulnerable and unable to deal damage effectively. Therefore, it's important to have the proper gear to support this build before attempting it. Additionally, Corpse Explosion becomes a valuable resource generator thanks to Grim Harvest, which consumes corpses to restore resources.


level 2

Bone Splinters

level 3

Enhanced Bone Splinters

level 4

Acolyte's Bone Splinters

level 5

Bone Spear

level 6

Enhanced Bone Spear

level 7

Supernatural Bone Spear

level 8

Corpse Explosion

level 9

Enhanced Corpse Explosion

level 10

Grim Harvest

level 11

Fueled by Death

level 12

Bone Splinters

level 13

Grim Harvest

level 14

Grim Harvest

level 15

Unliving Energy

level 16

Unliving Energy

level 17

Unliving Energy

level 18

Bone Spirit

level 19

Corpse Tendrils

level 20

Enhanced Bone Spirit

level 21

Dreadful Bone Spirit

level 22

Serration

level 23

Rapid Ossification

level 24

Bone Spirit

level 25

Bone Spirit

Renown 1

Bone Spirit

Renown 2

Bone Spirit


The skill point allocation suggestions we provide are only meant to offer guidance, and the most suitable way to allocate your points is something you'll need to explore in the game. The good news is that you can fully reset your skill tree for just 2,000 gold at level 25, which is a relatively small amount. This means that you can experiment with any of these builds at any level, without fear of being locked into one particular playstyle. If you're looking to level up quickly, you may want to consider buying Diablo 4 coins or buying Diablo 4 items from a reputable site like buymmog.com. However, it's worth noting that using these builds from level one may require an additional 1-2 hours to reach the maximum level, as you may need to adjust your playstyle to match the strengths and weaknesses of the build.


Copyright© Buymmog.com all rights reserved.   This website is owned and operated by HINOVATION LIMITED.